Chapter 7 - How to capture the parallel port's output (PRN:, LPT1:, LPT2: ... LPT9:) and serial port's output (COM1: ... COM9:)On Unix and Linux systems, redirecting the print output to a file is a very easy task, but on some old DOS or Windows Console Mode applications, the programmer did not give the end user this ability. In this case you can redirect the COM or LPT output to a file for Printfil, even if a serial or parallel printer is physically connected to that port (for example a Windows-only Laser printer), and even if the COM or LPT port is not physically installed on the PC (on new machines, serial ports and parallel ports are no more included nowadays, since USB ports replaced them). Printfil can capture a COM or LPT port on any Windows NT-based system (Windows NT, Windows 2000, Windows XP, Windows Vista, Windows 7, Windows 8, Windows 10, Windows 11, Windows Server 2000, Windows Server 2003, Windows Server 2008, Windows Server 2012, Windows Server 2016, Windows Server 2019, Windows Server 2022, Windows Server 2025). If Printfil detects a DOSBox version installed that supports the chosen LPT port or COM port (DOSBox MegaBuild 6, DOSBox SVN Daum, dbDOS PRO, dbDOSv, vDos, vDosPlus, and DOSBox-X for parallel ports), it asks you if you want to automatically configure it to capture the port even in that emulated DOS environment. If Printfil starts in evaluation mode on a 64-bit machine and detects that no DOSBox variant that supports printing is installed, a small message appears in the bottom-right corner of the screen. If clicked it points to a page explaining how to use our DosPrint utility to automatically download, install, and configure the right DOSBox variant. In the DOS age you were limited to use 3 parallel ports (max), each one of them could connect a printer (so 3 printers max. could be used on a single PC). With Printfil you no more have such limit, because even by capturing a single LPT port, that data can be forwarded to any Windows printer installed in the Control Panel (so, even if the DOS program prints to LPT1: only, its print jobs can be sent even to 300 or 3000 different printers). Normally then you no more need to setup the DOS program to print to different LPT ports to manage different printers; just leave it printing to LPT1: (for example) and let Printfil "address" the final printer (for example by enabling the "Choose" option in its own configuration dialog to ask the end user for the destination printer each time a job has been captured, or by the optional CFG file to send the job to a specific printer without user intervention, as described in Chapter 3). Anyway, Printfil allows even to capture multiple parallel ports and serial ports simultaneously on the same PC. To do so, you have to run different Printfil copies simultaneously on the PC, as described on Chapter 13, each one used to capture a single LPT port or COM port. Mode 0: How to capture an LPT port or COM portCapture Mode 0 is the standard mode to capture a LPT port or COM port on newer 32/64 bits Windows systems (Windows NT and later versions) You just have to select the LPT port or COM port in the Configuration -> Standard Printfil's dialog (you can access it by right clicking the Printfil's trayed icon, in the bottom right corner, near the Windows clock) Printfil will capture all data sent to that port by a DOS program or Windows program and will store them in the file specified in the "File to Check" configuration field, than that file will be forwarded to the Windows printer which is chosen in the same configuration dialog. All this happens automatically. You only have to ensure that the "File to Check" field contains a valid file name. You can leave the default value, or you can setup it as (for example) [e:TEMP]\Printfil.txt, which makes the Printfil.txt file created in the temporary directory (TEMP) of the user who is actually running Printfil. To capture different parallel ports and serial ports simultaneously, each Printfil copy running on the PC will have to redirect its own LPT port or COM port to a different temporary file (for example [e:TEMP]\LPT1.txt and [e:TEMP]\LPT9.txt) to avoid mixing or overwriting different print jobs. Mode 1,2,3: How to capture a LPT port on older Windows systemsCapture Mode 1, 2 and 3 are normally used only on Windows 9x/ME. In this modes, to capture the LPT output you have to create the "Printfil" virtual printer, as described on the next chapter, then Printfil can automatically capture data sent to the LPT port you choose in its own configuration dialog. The virtual printer redirects the LPT output to a temporary file on disk, which is also set in the "File to Check" option in the Standard Configuration dialog. This way, after the file has been created by the virtual printer, it's automatically captured by Printfil and sent to the Windows printer chosen in the same configuration dialog. As each single "Printfil" virtual printer can capture a single LPT port to a single temporary file, to capture different LPT ports simultaneously each single Printfil copy running on the PC will have to use a different virtual printer. Each virtual printer obviously must have a different name, declared in the PFPrinter option (please see Chapter 4) The 3 different capturing modes works in different ways. Mode 1 can show an error message if the configuration is not correct, but it's much more dependable by Windows then Mode 2 or 3, which uses a direct connection to the "Printfil" virtual printer. Mode 2 and 3 are particularly useful if some Microsoft security hotfixes are installed on your Windows system (for example KB885835), which could block the capture in Mode 1, by showing an error message. In all the 3 modes however, Printfil uses the Windows networking services to capture the parallel ports. In particular way, File and Printer Sharing for Microsoft Networks must be enabled in your network configuration. If
your PC is not networked, then you have to create a Local
LAN connection by installing the Microsoft
Loopback adapter virtual network card (the drivers
are included into your Windows CD-Rom - By the following link you can
access the FAQ page which explains how to install the
Microsoft Loopback Adapter step by step). This method also solves the Media Sensing problem on the most recent Windows versions. This new Windows feature allows connections to shared printers only when the network is physically connected (to avoid bad cables etc.), but on some situations this could cause problems. For example, even though your network configuration is ok, but your PC is not physically connected (say a laptop), Printfil can't connect to the "Printfil" virtual printer to capture the LPT output. If you do not want to add the Microsoft Loopback adapter to your network configuration, however you can disable the Media Sensing feature, as described on Microsoft's website: http://support.microsoft.com/default.aspx?scid=kb;en-us;239924 
|
|||||
26 Nov 2025
|
|||||
Printfil Manual - How to capture parallel ports (PRN:, LPT1:, LPT2: ... LPT9:) and serial ports (COM1: ... COM9:)
Windows Printing System For Applications
 How to print from DOS PRN, LPT1: to Windows printers: USB, Wi-Fi, PDF
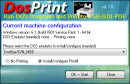 Run DOS programs on Windows 64-bit through DOSBox / vDos and print to USB, GDI, PDF printers through Printfil