Chapter 9 - How to create PDF and PDF/A filesYour legacy print jobs can be exported in PDF files simply by selecting any Windows PDF writer as destination printer (Acrobat Distiller, eDocPrinter, Pdf995 etc.). There is nothing additional to install on the PC. In addition, you can also have your jobs exported in PDF or PDF/A files by using GNU Ghostscript. In this case, the PDF file can be created with or without user intervention, you can encrypt it, set the permissions, an optional password to open it at a later time, and you can also choose to automatically send it via e-mail and/or print a hardcopy. Article and Video: How to print from DOS programs to PDF files Creating PDF files via GhostScript GNU Ghostscript is an interpreter for the PostScript ™ language and the Adobe Portable Document Format (PDF), distributed with the GNU General Public License (GPL), which allows free use, and free copying and redistribution under certain conditions (including, in some cases, commercial distribution). You can find more information and the source code of GNU Ghostscript at http://www.cs.wisc.edu/~ghost . Please note that GNU Ghostscript is not the same as AFPL Ghostscript. The former is distributed by the Free Software Fundation, while the latter is also known to work with PRINTFIL, but is distributed under the Aladdin Free Public License (AFPL)
All done !, you can now generate PDF and PDF/A files from PRINTFIL simply by selecting the "Printfil" printer. If you configure PRINTFIL to show a preview of the print job, the Print button will be disabled, while the Pdf button will be enabled. Once clicked, the Pdf button will ask the user for the type of the PDF file to generate, its name, and eventually its permissions (see "secure PDF" below). The E-Mail button, in addition to create the PDF file, will automatically attach it to a newly created e-mail message. If you configure
PRINTFIL not to show the preview, a file with the same
name as the ascii file (and PDF extension) will be
created without user intervention, with the
default permissions. For example, if your ascii
text file is c:\spool\file.txt , the PDF file
will be created as c:\spool\file.pdf Creating a secure PDF file via GhostScript The PDF/A ISO Standard doesn't allow encryption, while a "normal" PDF can be encrypted and password protected. In order to create a secure PDF file (40-bit RC4), a GhostScript upgrade may be required on the PC (GPL GhostScript 8.15 or newer). The simplest way to set the PDF permissions is by using the GUI dialogs which appears either in the Printfil's configuration window (default permissions), or by creating a PDF file through the preview window (with user intervention) Default permissions are stored in the SecurePDF entry, in the [Options] section of the Printfil.ini file, as follows: SecurePDF = Enc_Type | Permissions | Owner_Password | User_Password All the fields are separated by a pipe "|" char. Only the first one is mandatory (Enc_Type). If the SecurePDF entry is missing, the PDF file will not be encrypted. Enc_Type
Permissions
Owner_Password
User_Password
EXAMPLES SecurePDF=2|-44 - The PDF file will be secured. The end user can only print it or extract its content. SecurePDF=2|||John Doe - To open the PDF file, the end user will have to insert the John Doe password, then he'll be able to perform any operation to the file. 
|
|||||
17 Aug 2023
|
|||||
Printfil Manual - How to create PDF and PDF/A files
Windows Printing System For Applications
 How to print from DOS PRN, LPT1: to Windows printers: USB, Wi-Fi, PDF
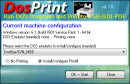 Run DOS programs on Windows 64-bit through DOSBox / vDos and print to USB, GDI, PDF printers through Printfil