Chapter 6 - How to merge logos and other background image filesWhen using the GDI printing engine, PRINTFIL can include logos and other graphical images to your print jobs. This feature is particularly useful to obtain jobs on "Letterheads" or on standard forms ("Invoices", "Order modules" etc.) These files can be previously created using any graphical editor, (Paint Shop Pro, CorelDraw etc.), then you can include them in your print jobs in several ways. The easiest for end users is just by selecting the desired background image at Configuration -> Standard -> Options
and Printfil will merge that image to the captured prints. Article and Video: Merge images to DOS print jobs instead of printing on preprinted forms If you're an experienced user, or a programmer, there are 2 additional, much powerful, methods:
In both cases you have to specify at least the name of the graphics background file to load. You can use files: WMF (Windows Meta Files), EMF (Enhanced Meta Files), BMP (Bitmap), PDF (Portable Document Format), JPG (Joint Photographic Experts Group), GIF (Graphics Interchange Format) and PNG (Portable Network Graphics). If the extension is not specified, WMF will be assumed. If the path is not specified, PRINTFIL will use the path of the ASCII print-job file (see the FileName setting of PRINTFIL.INI). In this way, a UNIX or LINUX application can create the file (for example) /usr/share/printfil/filexx.txt and write only "filexx.bmp" as background image. PRINTFIL on a Windows PC will search both files in the same directory (for example F:\PRINTFIL\FILEXX.*). If the specified background file is not found, or the Windows user running Printfil doesn't have read permission on it, no background will be included. Each kind of file has its own peculiarities:
As we said above, while WMF and EMF files will be enlarged to fit the entire page, the other files will normally be enlarged to "printable" dimensions (i.e. entire page minus the margins previously set). In addition, only the other files can be placed anywhere on the sheet by providing parameters after the file name separated by "pipe" ("|" , ascii 124) , according with the following syntax: FileName | Top | Left | Width | Height | FromPage | ToPage The first 4 additional parameters will be in the same units-of-measure set for the page margins. Top and Left are for placing the Top-Left corner of the Bitmap. If they are positive, the margins (are set in the configuration dialog) will be considered, else (if they are negative) the bitmap will be placed taking care only of the sheet's dimensions. For example, if you set the first two parameters to 2.5 | 1.2 and the margins are set to 0.5 Cm. on each side of the sheet, the bitmap will be placed at 3 Cm. from the top margin of the sheet and 1.7 Cm. from the left margin, while if they are set to -2.5 | -1.2 , the bitmap will be placed at 2.5 Cm. from the top margin of the sheet and 1.2 Cm. from the left one, independently by the margins set in the configuration dialog. The first case is useful, for example, to ensure an invoice will be always printed inside the "cells", because either the text or the bitmap will be redimensioned taking care of the margins. The second case can be useful to place a bitmap outside the margins: for example to add a logo at the top of a page which normally would be entirely filled with the text, without changing the source application. Width and Height have a little more sophisticated behavior:
FromPage and ToPage tells Printfil on which page(s) the bitmap has to be printed. They can be set to the same value (for example 1|1 = only the first page on the print job). If they are not set (or they are set to zero), the bitmap will be placed on all the pages. Please note that the CFG file is read BEFORE the print job starts while Escape Sequences are interpreted DURING the print job creation. The page parameters in the 2nd case can be used to tell Printfil IF the bitmap should be merged in THIS page or not, without having the source program making the necessary calculations itself. For example, the source program could place "One.bmp|||||1|1|Two.pdf|||||2|2|Three.jpg|||||3|3" on top of each page, and Printfil will merge just one (the right one) bitmap per page. The entire sequence can be repeated different times on the same row to specify different background bitmaps which can be printed on different pages and positions. EXAMPLES: Backgr.bmp|0|0|0|0 Sets only the name of the BMP file. The bitmap will be expanded to fit the entire "printable" sheet.Backgr.bmp|2|2|0|0 The bitmap will be placed 2 Cm. from the top margin of the sheet and 2 from the left margin (plus the margins) and will be expanded to the remaining area on the sheet.Backgr.bmp|2|2|0|-1 The bitmap will be placed as above, will be enlarged to the right margin of the sheet, and the height will be calculated to maintain the original proportions.Backgr.bmp|0|0|-1|5 The bitmap will be placed at the top-left corner, its height will be 5 Cm. and it will be as wide as necessary to maintain the original proportions.Backgr.bmp|7|3|-2|-2 The bitmap will be placed 7 Cm. from the top margin, 3 Cm. from the left margin and will be printed AS IS.Backgr.bmp|-2|-2 The bitmap will be placed 2 Cm. from the top margin of the sheet and 2 from the left margin (independently by the margins set into the Printfil's configuration dialog) and will be expanded to the remaining printable area on the sheet.header.pdf|0|0|-1|1|1|999999|footer.bmp|22|0|-1|1 Allows you to place 2 bitmaps on every page (the first one on pages from 1 to 999999 and the second one from 0 to 0, which is the same thing).faxcover.pdf|0|0|0|0|1|1|invoice.bmp|0|0|0|0|2 Allows you to place faxcover.pdf only on the 1st page (enlarged to the margins) and invoice.bmp on all the other pages.invoice.bmp|3|0|20|26|1|1|invoice.bmp|0|0|20|26|2 Invoice.bmp will be placed on all the pages, but shifted 3 Cm. up starting from the 2nd page. Article and Video: From printing DOS invoices on carbon copy paper to multipage PDFs 
|
|||||
17 Aug 2023
|
|||||
Printfil Manual - How to merge logos and other background image files
Windows Printing System For Applications
 How to print from DOS PRN, LPT1: to Windows printers: USB, Wi-Fi, PDF
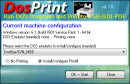 Run DOS programs on Windows 64-bit through DOSBox / vDos and print to USB, GDI, PDF printers through Printfil