Chapter 3 - Printfil configuration
Printfil configuration is
stored in the PRINTFIL.INI file.
It is usually managed by the Printfil configuration dialog (right
clicking the trayed icon), but, if you want, you can also edit it with
a simple text editor. Please note that in the second case Printfil has
to be restarted to activate the changes.
At Printfil startup,
the PRINTFIL.INI file will be searched in the current path. If not
found, it will be searched in the Windows
standard directory, which normally is C:\Windows or C:\WinNT in client systems (Windows 9x, ME, NT, 2000, XP),
C:\Users\Your_UserName\AppData\ Local\VirtualStore\Windows in Windows Vista / 7 / 8 / 10 / 11, and %HOMEPATH%\Windows in
Terminal Server environments (Windows Server 2000, 2003, 2008, 2012, 2016, 2019, 2022).
The configuration can even be Exported (for backup purposes) and Imported
(for example to easily move Printfil between 2 machines) by the Printfil's menu items that appear by right
clicking the trayed icon.
Optionally,
a second ASCII file (FILENAME.CFG)
can be created to store specific information, which can differ from
print job to print job.
This file is optional, but it's very useful to have a deeper control
over certain jobs. For example, you can use it to send a job to a
specific printer instead of sending it to the default selected one, or
you can set specific margins for a particular print job. If you want to
use it, it has to be created manually (usually by the same application
that creates the file to print).
PRINTFIL.INI
All the configuration
setting are included in the [Config] section. For example:
| C:\WINDOWS\PRINTFIL.INI
[Config]
FileName=F:\Spool\FileName.txt
Font=Courier New
|
Here is the meaning of its
entries:
FileName
This is the name of the
ASCII file(s)
to print. That file can be created directly by the source program or by
Printfil itself, when capturing a LPT port or COM port, as described on Chapter 7
of this manual.
This field can contain wildcards
(? , *) to check for multiple files simultaneously, and an optional
path (i.e. F:\SPOOL\FILE*.TXT).
It can contain environment
variables also, to check for multiple files and/or
directories simultaneously. (for example, [e:HOMEPATH]\filename.txt
, which is the default value when Printfil in installed on NT-based
systems (Windows NT, Windows 2000, Windows XP, Windows Vista, Windows 7, Windows 8, Windows 10, Windows 11, Windows Server 2000, Windows Server 2003, Windows Server 2008, Windows Server 2012, Windows Server 2016, Windows Server 2019, Windows Server 2022), makes Printfil
checking, for example, c:\document and
settings\Administrator\filename.txt or c:\document
and settings\user\filename.txt, depending by which user is
currently running Printfil)
Environment variables
must be included in brackets and start with e:.
For example: c:\dir\[e:ENV_VAR]\file.ext
Filename cannot have the
extension .CFG .
Therefore, if you want to use the optional cfg file (please see below
in this chapter), wildcard "*" cannot be used in the file extension (file*.txt
is acceptable, but file.* is not because in the
second case Printfil would try to print the optional file.cfg
also, while it's used for the configuration)
Capture ( LPT1: ... LPT9: , COM1 ... COM9: )
If you want to
automatically capture the output sent to a parallel port or serial port, you can
insert the port name here.
On Windows 9x/ME systems you cannot capture COM ports, and to capture LPT ports you also have to create
the "Printfil"
virtual printer into the Windows Control Panel, as described on Chapter
7: "Capturing the parallel port's output and serial port's output"
CapMode (
0 , 1 , 2 , 3 )
If Printfil is running on
a NT-based system (Windows NT, Windows 2000, Windows XP, Windows Vista, Windows 7, Windows 8, Windows 10, Windows 11, Windows Server 2000, Windows Server 2003, Windows Server 2008, Windows Server 2012, Windows Server 2016, Windows Server 2019, Windows Server 2022), you can
capture the output sent to a parallel port in 4 different modes. For
more information please see chapter 7: "Capturing the parallel port's
output and serial port's output"
On Windows 9x/ME only the 1
value is allowed.
Timer
This number is used to set
the number of seconds PRINTFIL must wait to check if a file to print is
present. It's not good to set too small a value because PRINTFIL could
start printing a file that your application hasn't finished generating.
Usually 2 seconds is a sufficient time to reach the end of the file
without annoying the user. Note that if your software performs long
actions during the generation of the file (for instance, long select
times over a very large database), your print file could pause for more
than 2 seconds and PRINTFIL could start printing too soon. In this case
you could even print to a temporary file, then, when the job if
finished, you could copy the temporary file on the final one.
This timer does not have
to be set as long as the print job creation, but as long as the longest
pause during the source printing process.
Printer
This is the name
(not the port) of the Windows printer to use without user intervention
if Choose=.F. (see below)
You can select one of the printers
installed in the Windows Control Panel and available for the current Windows user
or a special (virtual) printer named FILE: that doesn't produce any print
job at all, but exports the captured data into a TXT file.
The user normally is asked for the name of this TXT file as soon as Printfil has captured
a source job, unless you've enabled the
"Archiving print jobs" option that makes Printfil
keeping a copy of each captured job without user intervention. In this case, after
FILE: in the GUI configuration dialog is shown even the archiving path.
Choose (
.T. = true , .F. = false )
If set to true, when
PRINTFIL detects a file to print, it ask the user for the desired
printer.
The user can also modify the standard printer properties (copies, form
size etc.).
WTSnoSes (
.T. = true , .F. = false )
If set to true, on Windows Terminal Servers, the session no. after the printer name is ignored (for example: HP LaserJet (from REMOTE-PC) in
session 1" becomes just "HP LaserJet (from REMOTE-PC). This is an alternative to the "Choose"
option above to make the printer name consistent between different RDP sessions. Please find out more in the article:
How
to capture DOS print jobs on Windows Terminal Servers
RAW ( AUTO , GDI , RAW , PDF , PCL , PS )
Select the printing engine to use to manage the captured print job.
AUTO - Printfil checks which kind of print job has just captured and selects automatically the most suitable printing engine below.
GDI - This is the default mode for all the Windows programs. The captured legacy print job is converted into a Windows print job by the driver of the chosen printer.
RAW - When
printing in this mode, the source print job will be sent to the chosen
printer AS IS, without going through the Windows printer driver and
without making any change to the embedded escape sequences. This allows very
fast printing to dot-matrix printers (like in the DOS days,
even if the printer is USB), printing jobs containing graphical
printer commands (graphs, drawings etc.) and sending
particular escape sequences to special printers (cut labels,
open cash drawers etc.)
In
RAW mode, the job must be already formatted with
the right control codes for the destination printer. All printers can
be used, including USB ones, but GDI printers (printers that do not
accept an input RAW file) and virtual printers like FaxModems (WinFax
etc.) and PDF writers (Acrobat Distiller etc.)
For example, you can use the RAW printing engine to send labels created with ZPL commands, directly to a Zebra Printer, or complex AutoCAD drawings directly to an HP-PCL printer.
PDF - The "Direct PDF Printing" engine allows printing directly a PDF captured by Printfil to any Windows printer, even if it doesn't support this functionality natively.
This feature requires GhostScript installed on the PC.
PCL - The "PCL graphics" engine allows printing a file containing very complex HP-PCL control codes to any Windows printer, even if it doesn't support the PCL language (including virtual printers, like PDF writers).
This feature requires GhostPCL installed on the PC.
PS - The "PS graphics" engine allows printing a file containing PostScript commands to any Windows printer, even if it doesn't support the PostScript language.
This feature requires GhostScript installed on the PC.
| WARNING:
Up to Printfil 5.22 you could use the .T. and .F. values, where .T. = RAW and .F. = GDI.
These values are still supported for compatibility, but they are now deprecated and will be removed in a future Printfil version. |
Preview (
.T. = true , .F. = false )
If set to true, the
preview window will be shown before printing the file.
- If RAW=GDI (see above) the Printfil's integrated print preview will be shown
- If RAW=PCL or RAW=PS, Printfil will create a PDF through its own virtual printer and it will be shown by the default PDF reader
- If RAW=RAW or RAW=PDF, print preview is not possible
All the next settings in this chapter are used only with the GDI printing engine
PrevZoom (
.T. = true , .F. = false )
If
set to true, when opening the preview window the page will be shown
already zoomed. If it's = .F. print preview will show the entire
page on screen.
Font
This is the name of a font
installed on your Windows system.
There is no need to set
the size of the font because it is automatically resized to fit the
entire page (see below).
NOTE:
Theoretically you can use any font on your PC, but if your report was
designed to run on a dot-matrix printer, you should use a fixed-width
font (like Courier New or Lucida Console), or your columns will not
align properly.
Color
This is the RGB decimal
number of the text color. By default Black (RGB 0,0,0 = decimal 0) will
be set.
To calculate the RGB decimal number you can use the following formula:
RED
x 256 ^ 0 + GREEN x 256 ^ 1 + BLUE
x 256 ^ 2
For
example:
BLACK=RGB 0,0,0 = 0 x 256^0 + 0 x 256^1 + 0 x 256^2 = 0
RED=RGB 255,0,0 = 255 x 256^0 + 0 x 256^1 + 0 x 256^2 = 255
GREEN=RGB 0,255,0 = 0 x 256^0 + 255 x 256^1 + 0 x 256^2 = 65280
WHITE=RGB 255,255,255 = 255 x 256^0 + 255 x 256^1 + 255 x
256^2 = 16777215
AnsiConv (
.T. = true = Ansi , .F. = false = OEM )
This setting tells
PRINTFIL if it has to do OEM or ANSI conversion to the font Character
Map. OEM conversion is particularly useful if you want to print boxes
or other special characters using a PC8 font like the aSwIt
Mono 437
UM
Unit of Measure -
Centimeters or Inches - CM or IN
Top , Left , Right
, Bottom
These are the margin
settings (in the chosen U.M.)
Please note that is not a
good idea to set some margins to zero, because normally all the
printers need a minimum margin on each sheet's side to take it
(hardware).
Rows
Number of rows per page. A
page will be break at the specified amount of rows or whenever a Form
Feed character is encountered inside the print job (see Chapter 5:
Control Codes).
The font will be
autofitted to the page. The height of the selected font will be set
according to the height of the paper, as set in the printer properties.
CutRows
This parameter tells
Printfil how many rows it has to "cut" after each page. It could be
useful if your original application was printing an additional band
after each page, but you want only the main page to be interpreted by
Printfil.
For example, if your
source app. is printing to 16" sheets (96 lines), where the first 12"
(72 lines) are containing an Invoice and the remaining 4" (24 lines)
are used for a separate band, you can set this Rows=72 and CutRows=24
to obtain only the Invoices printed on A4 sheets, without having to
modify the source application.
A "Form Feed" control code
into the ascii file will cause to stop the line-counting for this
section and to start a new section/page.
For more information see Chapter 5: "Control Codes"
Columns
This is the maximum number
of columns in the print job (i.e. the length of the longest line in the
file). PRINTFIL will autofit the font changing its width according to
the width of the paper indicated in the printer properties.
If there are more
characters in a row than the given value, the exceeding characters will
be ignored.
If you set this parameter
to 0 (zero), PRINTFIL will use the maximum value found in the first
page to print.
AutoLand
In this field you can set
the number of characters per row that PRINTFIL will use to
automatically set the page orientation to Landscape.
For instance, if it is set
to 100, an 80-column file will be printed in Portrait, while a 132
column file (the typical compressed A4 in DOS, or the normal A3), will
be printed in Landscape.
If it is set to 0 (zero),
PRINTFIL will not do the auto-orientation. However the user can set the
preferred orientation using the Windows printer dialog box (if
Choose=.T.).
FILENAME.CFG
This file is optional. It's
usually created by your application with the file to print, but you can
also create it with NotePad. This is a simple ascii file, without .ini
format
Without this file, or some
rows in it, PRINTFIL will use default values.
The FILENAME is the same as
the file which Printfil is currently printing, including path. The
extension must be .CFG.
For example, if in PRINTFIL.INI FileName=C:\Spool\file*.txt, and
Printfil is currently printing file0001.txt, then this file must be
named C:\Spool\file0001.cfg
It can have 15 rows:
1) PRINT NAME
This is a description that
will be displayed on the title of the preview window (if it exists) and
in the list of pending spooler processes.
The default value is
"Preview" (in your local language)
2) NUMBER OF ROWS |
CUTROWS
If present, this setting
overrides the Rows setting in the Printfil.ini file.
Optionally you can set a
second parameter, separated by a "pipe" ("|" , ascii 124) to override
also the CutRows setting in the Printfil.ini file
For example, if your
source app. is printing to 16" sheets (96 lines), where the first 12"
(72 lines) are containing an Invoice and the remaining 4" (24 lines)
are used for a separate band, you can set this row in the CFG file as:
72 | 24
to obtain only the
Invoices printed on A4 sheets, without having to modify the source
application.
3) NUMBER OF COLUMNS
If present, this setting
overrides the Columns setting in the Printfil.ini
file.
If you insert 0 (zero) in
this row, PRINTFIL will use the maximum value found in the first page
to print, independently by the value stored in the Printfil.ini file
4) BACKGROUND FILE
In this row you can specify the name(s) of the graphics background file(s) to be eventually included in the page(s)
of the print job.
If the file is .BMP, .JPG, .GIF, .PNG or .PDF, you
can also add some parameters to control its dimensions and position on
the pages. See Chapter 6.
5) NUMBER OF COPIES
This is the number of
copies of the document PRINTFIL will print.
If it’s not
specified, the default value is 1.
If the Choose=.T. in
PRINTFIL.INI (or in the 8th row in this file, see below), the number of
copies PRINTFIL will print is the number specified in the printer setup
dialog.
6) PAGE MARGINS
This row can contains the
margin settings and the U.M. used (Unit of Measure - Centimeters or
Inches), separated by commas, as follows:
U.M.,
Top, Left, Bottom, Right
If the row is present this
margins will be applyed to the current print-job only.
If the entire
row is not present, PRINTFIL will use the default margins (set on
PRINTFIL.INI)
If only some values are
not specified, PRINTFIL assume them to be 0 (zero). For example: CM,1,0,2,0
and CM,1,,2 are equals.
Please note that is not a
good idea to set some margins to zero, because normally all the
printers need a minimum margin on each sheet's side to take it
(hardware).
7) PRINTER
This is the name of the
Windows printer to use to send this print-job only.
This works only
if Printfil is configured to not ask the user for the desired printer (
Choose=.F. - in PRINTFIL.INI or 8th line in this file )
If the row is not present,
or it contains an invalid name, PRINTFIL will use the default printer
set on PRINTFIL.INI
8) CHOOSE PRINTER
If present, this setting
overrides the Choose setting in the Printfil.ini
file. See above.
9) PREVIEW
If present, this setting
overrides the Preview setting in the Printfil.ini
file. See above.
10) NUMBER OF CHARS
TO AUTOMATICALLY SET THE ORIENTATION IN LANDSCAPE
If present, this setting
overrides the AutoLand setting in the Printfil.ini
file. See above.
If you want a single print
job to be surely Portrait you can set this value to 9999. If you want
it surely Landscape you can set this row to 1. Setting it to 150 means
that if the job is 150 columns wide, it will be Portrait, while if it's
wider, it will be automatically Landscape oriented.
11) PRINTING ENGINE
If present, this setting
overrides the RAW setting in the Printfil.ini file.
See above.
It's usually used in
combination with the row 7 to send complex jobs to dedicated printers
or to print very fast to dot-matrix printers.
12) E-MAIL
If present, this row is
used to send the print job via e-mail in PDF format. Please see Chapter
10.
It can contains 5 values,
separated by "pipes" ("|" , ascii 124)
Show
| e-mail | Subject | Body | Attachment
Show = .T.
(true) or .F. (false) - Whether to show the e-mail
message to the user before being sent. If it's .T.
and the user don't click the Send
button, the message will be closed without being sent.
e-mail
= Destination address(es). If not provided, Printfil searches for them in the first 1000 lines of text in the captured print; if none is found, Show
is assumed as .T., so that the end user can insert it before sending the e-mail.
In this line instead, you can
specify multiple recipients separating them by ";". Each
single
address can be specified either as user@domain.com
or as Name
<user@domain.com>
If Printfil is configured to send out mail via smtp
(please see EMailClient
on Chapter 4) you can specify
e-mail addresses even in Cc (Carbon Copy) and Bcc
(Blind Carbon Copy), such as
cc:user@domain.com
or Name
<bcc:user@domain.com>
Subject
= Mail subject.
Body =
Mail body. It can be a simple text or a file name (with optional path)
containing the text. If a file name is specified, and the file exists,
then it's content will be used as mail body.
Attachment
= Optional attachment. In addition to the print job as a PDF file that's automatically attached by Printfil, you can specify another file name.
If the file exists, then it's attached too.
This is particularly useful if you wish to attach a fixed image, a document, or another file created by the source program when creating the print job itself (for example, in some countries, when sending out a PDF/A invoice via e-mail you need to attach even a XML file describing the invoice content).
Either the subject or the
Body will be converted in Ansi / Oem format, depending by the AnsiConv
setting in Printfil.ini
Please note that even
though setting this row simply as .F. is sufficient
to tell Printfil the PDF file should be sent by e-mail, if you want to
send it without user intervention, you have at
least to specify it as .F.|user@domain.com ,
otherwise the e-mail message will be shown on screen.
Even
thought now this row is used only when Printfil is set to print to its
own virtual printer, don't insert it if you don't want to send the job
via e-mail because in future Printfil versions it may be used even in
other cases.
EXAMPLES
.T.
- After the job will be printed as a PDF file, an e-mail message will
be automatically shown to the user. The user can complete the message
and send it or not.
.F.|user@domain.com
- After the job will be printed as a PDF file, it will be automatically
sent to user@domain.com without user intervention
.F.|user@domain.com|My
Subject|My Body - After the job will be printed as a PDF
file, it will be automatically sent to user@domain.com without user
intervention, with subject "My Subject" and body "My Body"
.T.|user@domain.com|My
Subject|C:\Path\MyBodyText.txt - After the job will be
printed as a PDF file, it will be shown to the user, who has then to
choose whether to send it or not. The message is already filled with
the destination address user@domain.com, subject "My Subject" and the
content of the C:\Path\MyBodyText.txt file as body.
.F.|John
Doe <john.doe@domain.com>; Jane Roe
<jane.roe@domain.com>|My Subject|C:\Path\MyBodyText.txt -
The job above is sent either to John Doe or to Jane Roe without user
intervention.
.F.|John Doe
<john.doe@domain.com>; Jane Roe
<bcc:jane.roe@domain.com>|My Subject|C:\Path\MyBodyText.txt -
The job above is sent either to John Doe or to Jane Roe without user
intervention (but John will not know the message has been sent even to Jane if Printfil has sent it directly via smtp).
.F.|John Doe
<john.doe@domain.com>; Jane Roe
<bcc:jane.roe@domain.com>|My Subject|C:\Path\MyBodyText.txt |C:\Path\Attachment.Doc -
Like above, but in addition to the print job as a PDF file, C:\Path\Attachment.Doc will be attached too (if existant).
13) PDF FILE NAME | OPEN/PRINT | RUN_EXTERNAL_PROGRAM
If you are creating a PDF
file without user intervention through the
"Printfil" virtual printer (Please see Chapter 9), you can insert the
destination file name in this row, with an optional path and extension.
If the PDF is created
succesfully, you can also choose to automatically open it by using the
standard PDF reader (for example Acrobat Reader) or print it to a physical printer.
- If you don't specify a
path, the PDF file will be created in the current directory
- If you don't specify an
extension, .PDF will be added to the specified file name
- If you'll specify an
extension different than .PDF, it will be changed to .PDF
- If you don't specify
nothing, the PDF file will be named as the corresponding TXT file, with
.PDF extension
For example: If the spool file name is c:\spool\printfil.txt , then the
corresponding PDF file will be created as c:\spool\printfil.pdf
You can even insert the parameters
[D] and/or [T] to make Printfil automatically inserting the
current date and time in the file name. In this way you can manually
create a single static CFG to generate different PDF's rather than overwriting
the same one each time.
After the file name, you
can optionally insert a parameter, separated by a "pipe" ("|" , ascii 124). It can contain:
- .T. - Open the newly created PDF file by using the standard PDF reader
- .F. - Do nothing
- Printer Name - Print the PDF to that printer
- Invalid Printer Name - Ask to which printer you wish to Print the PDF
After the
Open/Print parameter you can insert a 3rd parameter, separated by a "pipe" ("|" , ascii 124)
to run an external program (plugin) that further modifies the PDF just created by Printfil, before it's shown, printed or emailed.
The PDF file name is passed to the external program by a command line parameter (%1).
For example, you may want to digitally sign the PDF, or convert it in the base64 format and include it into an XML file as required in certain Countries for the e-invoices.
EXAMPLES
c:\spool\MyFile
- The PDF file will be named c:\spool\MyFile.pdf, independently by the
name of the ascii spool file.
c:\spool\MyFile.pdf|.F.
- Same as above.
c:\spool\MyFile.pdf|.T.
- After creating the c:\spool\MyFile.pdf file, it will be automatically
opened by using the standard PDF reader.
c:\spool\MyFile-[D]-[T].pdf - The PDF file
will be named c:\spool\MyFile-20150418-103015.pdf if now is 18 April 2015 at 10:30:15
c:\spool\MyFile-[D]-[T].pdf|Canon MX490 series Printer - The PDF file
will be named c:\spool\MyFile-20150418-103015.pdf and it will be automatically printed to the Canon MX490 series Printer
c:\spool\MyFile-[D]-[T].pdf|Nonexistent Printer - The PDF file
will be named c:\spool\MyFile-20150418-103015.pdf and you'll be prompted to choose the destination printer
|.T.
- The PDF file will be named as the corresponding TXT file, with PDF
extension. After creating the PDF file, it will be automatically opened
by using the standard PDF reader.
c:\spool\MyFile-[D]-[T].pdf| |c:\spool\Sign.bat - The PDF file
will be named c:\spool\MyFile-20150418-103015.pdf and the program c:\spool\Sign.bat will be run to digitally sign it.
14) DELETE THE CFG
If
this line contains .T., the CFG file is automatically deleted by
Printfil after the corresponding TXT file will be printed, otherwise it
will stay in place. Deleting the CFG might be useful if the source
program creates it just for some print jobs (to
include a
specific BMP background for example), while you should never setup this
line to .T. if the CFG file is manually created (statically).
15) CALL EXTERNAL PROGRAM
In this line you can specify the name of
third party program Printfil will invoke as soon as it has captured a
print job, but before it's processed.
The captured print job is stored into a temporary file on disk, whose
name is passed to the external program by a command line parameter
(%1). This way for example a programmer can write a "plugin" that
modifies the print job (or copies it somewhere), then Printfil will
process the resulting print-job-file.
For example, line no.15 in the CFG may contain: C:\Windows\Notepad.exe
and the captured print job will be shown inside the Windows Notepad
before it's processed by Printfil to be sent to the chosen Windows
printer.

|

 How to print from DOS PRN, LPT1: to Windows printers: USB, Wi-Fi, PDF
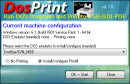 Run DOS programs on Windows 64-bit through DOSBox / vDos and print to USB, GDI, PDF printers through Printfil